


Joined
Aug 20, 2009 · 9 Posts
Discussion Starter · #1 ·
Feb 28, 2010 (Edited) Well, I could not come up with any more excuses as to why I should not get this project done (None that my wife would believe!) Since I could not locate any detailed info on the net, I would like to share my experience. Just for the record, I am a simple home mechanic with average tools and an above average mechanical aptitude. I have diagnosed my
problem to be the Pressure Control Solenoid, but since there are four solenoids in there, I decided to change all four at the same time (PCS, TCC, Shift1-2, Shift2-3)
GM Parts List: NOTES: The rubber boot that surrounds the bottom of the steering shaft will separate when the subframe is lowered, be sure to re-seat it after you raise the subframe! All wrenches/sockets used were metric! A large breaker bar comes in handy as well as an Impact wrench and an air ratchet. I chose not to drop the pan and drain the fluid until after the solenoid job was complete.
This allowed for a small amount of fluid to leak onto the floor after I removed the driveshaft. It could have easily been done before I started the removal process. I just did not want to go to all that trouble until I had a chance to evaluate the solenoid situation. After the job is complete, you may need to have your wheel alignment checked, but mine appears to be OK. Please note, I have a 2003 Impala 3.4 - 6 cylinder with 80k miles. This worked for me and may not work for you.
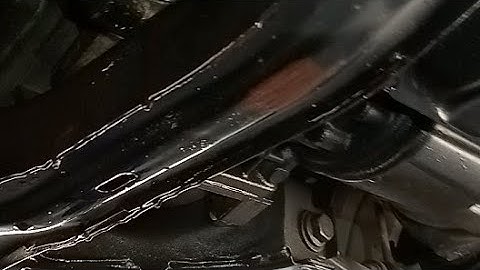
I have attached some photos: Good luck. 377.2 KB Views: 16,832
381.4 KB Views: 14,819
 377.7 KB Views: 14,873
344.4 KB Views: 15,015
381.1 KB Views: 15,369
341.8 KB Views: 18,029
333.2 KB Views: 14,803
387.5 KB Views: 62,331
393.2 KB Views: 28,617
382.8 KB Views: 50,243 Joined Aug 20, 2009 · 9 Posts
Discussion Starter · #2 · Mar 11, 2010 Update! Greetings, I have driven just over 300 miles since the repair and I have not been able to reproduce the original symptoms. I shall call this a success! Thanks, Joined May 1, 2010 · 1 Posts
Excellent Post Ogriv! Is your vehicle still running good? What symptoms did you have that lead to your diagnosis?
Joined Aug 20, 2009 · 9 Posts
Discussion Starter · #4 · Jul 6, 2011 Greetings, The repair is holding up just fine! I have put a few more thousand miles on the car and the original symptoms have yet to reappear. I did receive a few PM's requesting the details of the original symptoms so I will briefly explain them here. I had two symptoms. The most prevalent occurred when I would accelerate from a dead stop.
The engine would rev up but the car would not move for a second or two then it would act like you just popped the clutch on a manual transmission and would "clunk and jerk" into motion. This would also occur from the shift from 1st to 2nd while in motion at a speed under 30 mph or so. The second symptom was less noticeable but was just as annoying. You could hear a low "whining" sound coming from under the steering column. This sound was coming from one of the defective solenoids. I'm not sure
if it was coming from the coil of the solenoid or from the fluid rushing by the partially open or closed valve of the defective solenoid. -Ogriv Joined Jan 30, 2011 · 38 Posts
Greetings, The repair is holding up just fine! I have put a few more thousand miles on the car and the original symptoms have yet to reappear. I did receive a few PM's requesting the details of the original symptoms so I will briefly explain them here. I had two symptoms. The most prevalent occurred when I would accelerate
from a dead stop. The engine would rev up but the car would not move for a second or two then it would act like you just popped the clutch on a manual transmission and would "clunk and jerk" into motion. This would also occur from the shift from 1st to 2nd while in motion at a speed under 30 mph or so. The second symptom was less noticeable but was just as annoying. You could hear a low "whining" sound coming from under the steering column. This sound was coming from one of the defective
solenoids. I'm not sure if it was coming from the coil of the solenoid or from the fluid rushing by the partially open or closed valve of the defective solenoid. -Ogriv I am having those exact same symptoms, and will probably need the same in the near future. But, for the time being, I am babying it. I never drive over 60 on the freeway, and don't race it off the line. I've got 162K on mine. Curios as to why, when you were that far in, that you chose not
to replace the driveshaft output seal...as this seems to be a source of leakage that would lead one to believe they have a transmission leak. One of your pictures clearly shows how accessible it was when you had everything apart, and it seems that for the time you put in, that it would have been a good idea to replace it at the time. Again, just curious. Excellent article, and I will keep it in mind for the future.
Joined Apr 22, 2012 · 6,289 Posts
11. This part is called your "steering knuckle" Joined Jan 17, 2013 · 6 Posts
Trans Side Cover Removal on 07 LTZ I want to add my experience with this walk-through on my 07 LTZ with the 3.9L engine and 80,000mi. I was having the same slipping symptoms (not positive on the whining solenoid, but I think I could hear what Ogriv was talking about). Before it was doing it 100% of the time that I accelerated normally. If I
put the selector manually in 1 it would not slip, or if I was REALLY easy on the gas it wouldn't do it. The instructions in the original post do apply perfectly (as far as I can tell) to the 8th gen impalas like mine. I did skip step 10, and anything related to removing the steering knuckle and strut/spring. This prevents any concerns with an alignment. I had quite a few issues with rusty/stubborn parts that I'll mention; perhaps they'll be helpful to someone else. I'm in a
similar skill range as Ogriv; a simple home mechanic with average tools and not afraid to buy more tools or tear into new things. 1. My axle shaft was frozen inside my wheel bearing. I wanted to save the bearing, so I didn't introduce heat, but it took a very long time to get out. I used an air hammer in
the indentation of the axle shaft, which didn't work at first. I soaked it with penetrating oil and spun the axle nut back on until the outside faces of the nut and axle were flush. Then I worked it with a 4lb sledge and the air hammer again. It finally came out. Letting the engine drop that far with the hoist was very intimidating for me. Be aware that this job will stretch your comfort zone if you've never manipulated your engine with it partially installed. I'm very pleased with the results though. Thanks to Ogriv for the write-up and thorough description of symptoms; I wouldn't have tried this project without your information. Joined Jun 21, 2013 · 19 Posts
I have started doing this job and am at the point where the side cover is off but it will not go through the opening. I did the job alittle differently in which the two drivers side sub frame bolts are out and the passenger ones are loosened. The subframe is supported through one jack and the transmission is supported through another... so I can raise and
lower them independently. The car is supported in the front on a jack stand (drivers side). Passenger wheel is still on on the other side. The steering rack is disconnected off of the sub frame at the two bolts - I left the steering column knuckle together... and supported the rack with ropes to a bar ontop of the engine. So the subframe lowers... but not enough it seems. Everything else is off including the sway bar connection. I did not disconnect the two throttle cables... but will try this
as well. Any other ideas? Joined Feb 14, 2014 · 3 Posts
02 impala problem I have a 02 impala i notice that i had a fluid leak and got it fixed i thought that it was casing the problem i was having when my car change out in second or third shift i put my impala on the computer @ the dealer ship it said long shift they said they think it could be solenoid i had the fluid and transmission
gasket replaced but still didn't not help any suggestion the dealer ship wants to charge an arm & leg to do the repair what suggestion do you have for me anyone please Joined Feb 14, 2014 · 3 Posts
question Hello Everyone I am New to this page i need help with my 2002 impala i notice that when i start to take over my impala is has something like a jerking feeling it seems to do it after a while so i notice that i had a fluid leak from the transmission line i got the line replaced and transmission pan gasket replaced and its still doing the same thing after noticing all of the i had the dealer to put the car the machine they told me the computer said long shift that it was one of the solenoid how do i no which one to be replaced any suggestion on what to do trading the car in is not an option for me if any one reads this post please help me out thanks Joined Mar 27, 2011 · 246 Posts
was your car diagnosed with a P1811 code? I did a common Transgo shift kit project which replaces the lower half of transmission's accumulator pistons with upgraded springs. It did make a difference, but still my car produces what you just mentioned a "clunk and jerk" symptom, but it doesn't really make a clunk sound, but I do feel the car jerk from time
to time especially coming from a stoplight. It does it occasionally though. Joined Dec 9, 2015 · 2 Posts
Impala trans issues Thanks for the insightful step by step thread.k3: We have like 25 Impalas at the city garage. Mostly police cruisers. Was able to google a problem and came up with this page. Showed my supervisor and he opted not to put this much work into an older vehicle. Going to try and flash update the TCU, to see if that
makes any difference. Also flushed the fluid, while I was at it. These cars get the ATF done once a year, so the trans normally last quite a long time, without fail. Although adverse driving conditions and all our brick roads take their tole, on them. :yikes: JT Joined Oct 27, 2016 · 1 Posts
Excellent post. I have had to do this on a 2002 Venture and a 2005 Impala. I changed the Pressure Control Solenoid only. Both vehicles would slam in to gear at start up. This fixed the problem. Unfortunately the Impala was totaled about 10000 miles later. The Venture went another 35000 miles, before I sold it, with out a problem. I am getting ready to
change this out on my mom's car this weekend. This was a great refresher. It's been a couple of years. The Impala was first. Took 12 hours. The Venture took 10 hours. Hoping to do it in 8!!!
I have seen a transmission mechanic talk about the real issue can be fixed by replacing the TCC apply valve from sonnax. Even though I have seen many people just replace the solenoids or add a shift kit and that prevented the car from going into max adapt long shift. Where is the transmission pressure control solenoid located?In most cases, solenoids are located inside of the oil pan, connected to the valve body. Depending on what you drive, the technician may be able to replace just the failed shift solenoid.
What does a transmission pressure control solenoid do?The role of a transmission shift solenoid is to control the flow of transmission fluid. The transmission control module (TCM) sends an electrical signal telling the shift solenoid when to transfer fluid into and out of the transmission and at what rate.
What is a pressure control solenoid C?The electronic pressure control solenoid is one of the many components used to facilitate and monitor gear shift changes in the transmission. In particular, this part provides the data that allows the PCM to regulate the transmission fluid pressure.
|

2006 chevy impala transmission pressure control solenoid location
Related Posts


Copyright © 2024 chuyencu Inc.